


Bee
-
Posts
4,587 -
Joined
-
Last visited
-
Days Won
26
3 Followers
Bee's Achievements
")
Veteran (11/12)
5.7k
Reputation
-
Well I'm not getting a red ferrari if it's going to fade. Could get black I suppose. Or shall I stick with the Kangoo van? Ferrari or Kangoo? Yep, its the Kangoo, can't get a roof rack on a ferrari so completely useless.
-
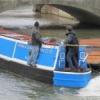
Bee has some red on her, (actually burgundy but it's not far off red), In the really intense French sun of this summer it had noticably faded in just a couple of weeks. Doesn't matter too much as it sort of turns into a dark terracotta colour which is OK but red is not a reliable colour. Below the waterline and just a couple of inches above she is painted in red epoxy that is slowly turning a rather fetching shade of pink. The decks and roof are in light grey which is now faded to off white. Tempted to paint the whole thing in khaki and have done with it.
-
Sorry to hear that. Personally I would keep an eye out for a lump of enormous, heavy, rusty anchor chain - think Titanic - and drape it over the genny. If it looks impossible to cut it you might not need to even fix it very well at either end. The problem then is if somebody needs a bit of enormous, heavy rusty anchor chain as a bit of ballast and nicks that.
-
The "What do you think of this Boat for Sale?" thread
Bee replied to Shandybass's topic in Boat Building & Maintenance
As its a 1976 boat you do need to be careful. There is more than a chance that the underwater hull has developed holes like those in the steel and the original steel has been extensively overplated and the rest will need doing very very soon. There are many good boats that have some overplating but there are also some not very good boats that will break your heart and your wallet. A 50 year old boat with a new floor laid over an old floor and an extensive cosmetic makeover might well be a trap for the unwary. -
I think its Nicols who have a base at Dole on the Rhone and Rhine canal. Dole is a really nice ancient town, the canal is one of our favourites and it's a perhaps not so hot as the c. du Midi. Locaboat (?) have a base at Migennes on the Bourgogne. Its a beautiful canal but the drawback for us is that the lockeepers travel on their mopeds to do the locks, that means that they want to know where and when you are stopping etc. and you don't have so much freedom of choice re stopping or sightseeing and there is a lot of locks on that canal. Brittany sounds fun though.
-
My thoughts on corrosion, microbial / old fashioned rust / electrolysis of some sort or anything else nasty that happens is that the steel boat owner on 'fresh' water needs to understand that boats ought to come out of the water more frequently than we thought, every 2 - 3 years might be sensible, the bottom plate needs to be properly painted and dry on the inside and the best that modern paints can offer should be used and lastly, brand new boats should be properly painted. The old days of slap a thick coat of bitumen on the sides, don't bother with the bottom and it'll be good for 10 years don't work. Bee was out of the water last year and on blocks next to a boat that had been Coppercoated. That hull was perfect. Too expensive for me and maybe not fully proven but impressive.
-
The propshaft on Bee came from a boat jumble, dunno about the taper, the prop fits OK but the nut on the end is Whitworth. Must get a spare sometime 'cos the chances of finding another half way down the Burgundy canal is absolutely zero.
-
Weed Hatch - Mission Impossible
Bee replied to DucksAreFaster's topic in Boat Building & Maintenance
I have the opposite problem - no weed hatch. Our problem is canals with less traffic, we are mostly on French canals and the water is sometimes gin clear and weed growth is rapid plus there are lots of invasive species that grow like crazy. I'm not exaggerating when I say that sometimes we are brought to a virtual standstill every couple of hundred yards or so. The good old muddy and opaque UK canals don't usually grow dense weed so much. We use a pole with a sharp pointed steel hook on the end to rip stuff off the prop but it really is a damned nuisance. Hopefully the same horrible weed will not make it across the channel otherwise it will be a nightmare. -
This post cannot be displayed because it is in a forum which requires at least 10 posts to view.
-
Weed Hatch - Mission Impossible
Bee replied to DucksAreFaster's topic in Boat Building & Maintenance
That Vetus 'tiller' might go a bit higher - just an inch or so - on the rudder shaft and if the hydraulic ram itself was made to bolt on from above the arm instead of below with a couple of inches of packing and longer bolts to lift the cylinder that might just give enough clearance to help a bit. Maybe lengthen the rudder shaft a bit if there is enough room ??? -
From memory mine is the P60 k, the shaft dia of Bee is 1.5 inch, very common on narrowboats, but there are tapered inserts to fit different sized shafts in that particular unit. If you have a propshaft rebuilders nearby they will certainly be able to help you. The place I used was in Wolverhampton but I can't find them on Google so they might have gone.
-
Pretty much what I did, I think the pair of joints I got were for a Ford Sierra or VW bus or something like that but thanks for the part number. They are indeed very expensive from the manufacturer.
-
Weed Hatch - Mission Impossible
Bee replied to DucksAreFaster's topic in Boat Building & Maintenance
That's awkward. Removing that Vetus tiller arm every time you use the weed hatch is not really an option, It has two clamp bolts on it that are not easy to access and no doubt the stops are at the full extent of the travel of the ram so that won't help either. I think your only option is to do something with the 'cavitation plate' below the lid and I guess that cutting bits off the thing until it clears the stuff that is in the way is probably the way forward. Having removed it there might (!) be some sort of obvious solution. Maybe fix the lower plate on some sort of 'dogleg' strut arrangement so that you can lift the assembly up by a few inches then tilt it over. Good Luck -
Weed Hatch - Mission Impossible
Bee replied to DucksAreFaster's topic in Boat Building & Maintenance
I think a two part lid would be a horribly clattery affair. Even if you could move the limiting stops I would guess that it probably would not make enough difference to extract the lid and its plate as that would still leave you with the ram and other bits. I think you might have a problem that can only be solved by reducing the depth of the lid and its lower plate. i wonder if it would make much difference to anything if the cavitation plate did not go right to the bottom of the weed hatch? That seems the simplest solution. either that have two lids, a top waterproof one and a bottom lid that was hinged to a ledge at the bottom of the 'hole'. Sounds a bit of a bodge but Can't think of much else. -
Surface preparation & Jotun Jotamastic 87
Bee replied to Mark R's topic in Boat Building & Maintenance
I would e mail the paint manufacturer. Last autumn I had to do a lot of prep to the underwater hull of Bee, Poor old thing was covered in barnacles and mussels as she had been in brackish water for a while. That left a surface a bit like your roof. Jotun recommended just painting on Jotun 90 with no other primer or treatment.

